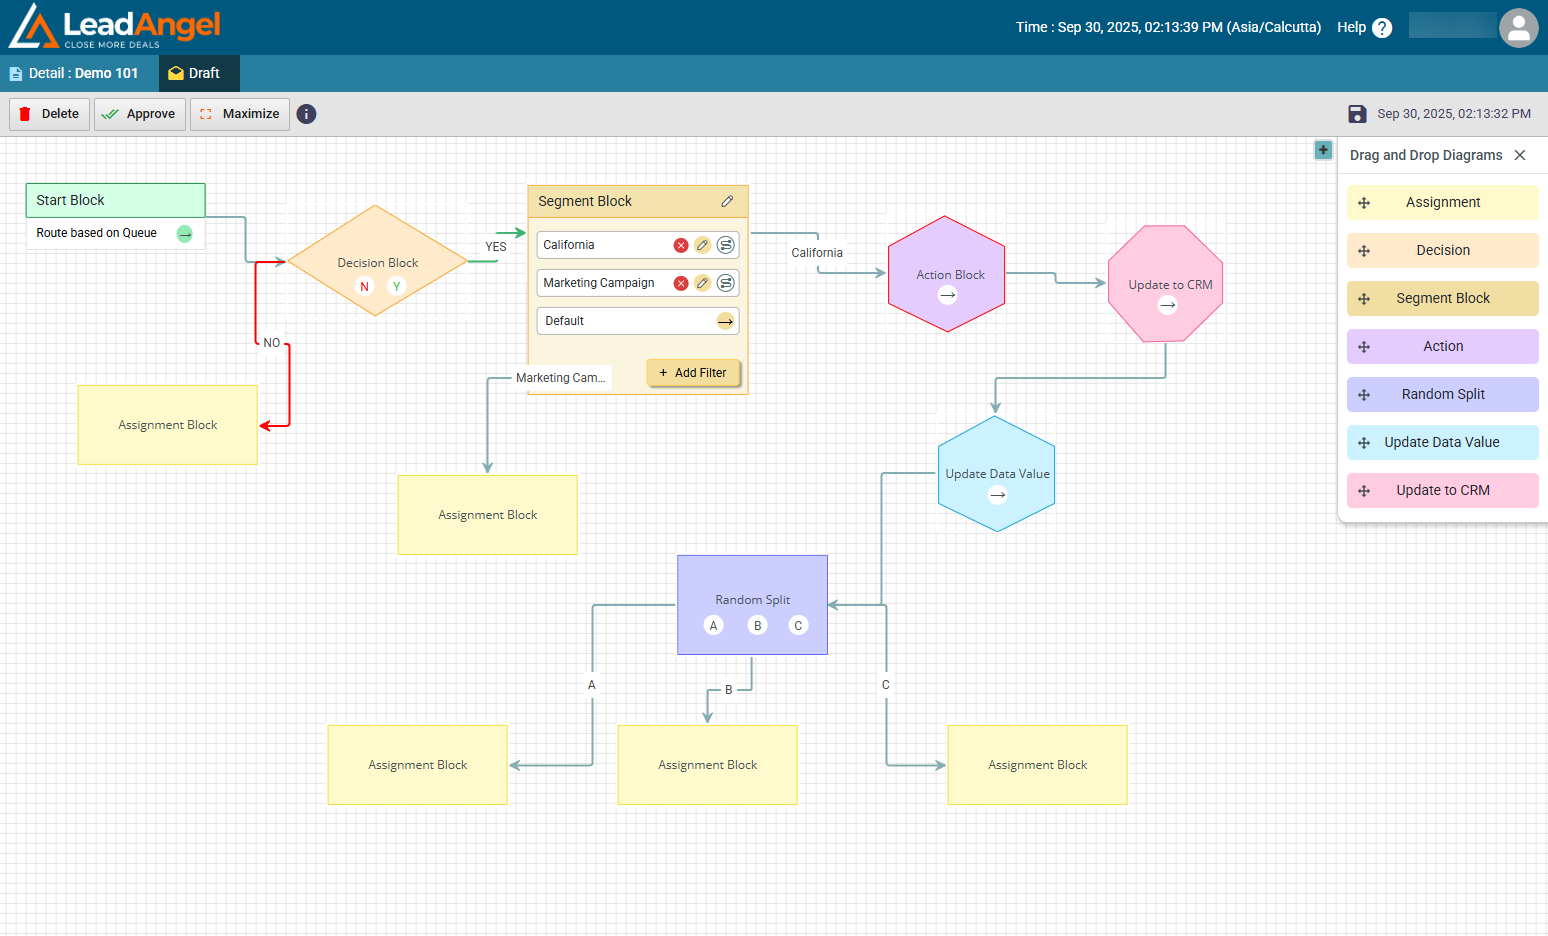
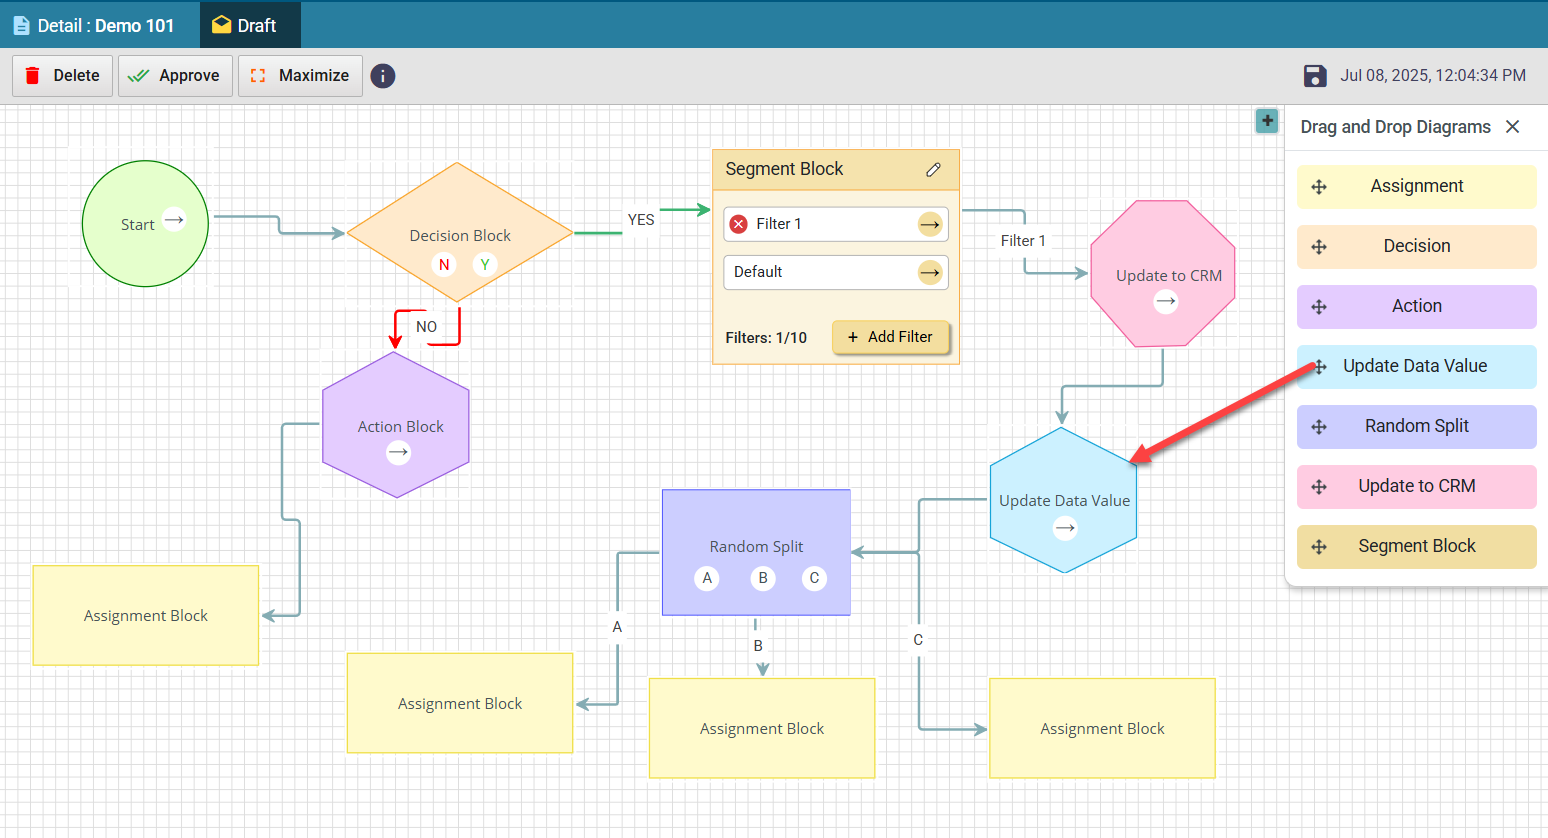
¶ What is Router Canvas?
Router Canvas is an intuitive drag-and-drop, flowchart-based router builder. It helps create visual routing logic using the following building blocks:
- Decision or Filter (Lead Filter, Contact Filter, Account Filter, Opportunity Filter, etc.)
- Assignment
- Segment Block
- Action
- Update to CRM
- Random Split
- Update Data Value
All blocks behave the same across all objects.
¶ Connection Properties
- All blocks must be connected to a parent block except the Start block.
- All blocks can have a maximum of three inputs.
- You can only edit a flowchart once it's constructed and approved. After approval, the building blocks on the top right disappear.
- To edit, click the Edit button on the top left.
- To delete or deactivate, click the Delete/Deactivate button after approval.
¶ Canvas Controls
¶ Maximize/Minimize
- Click Maximize to expand the canvas to the full window.
- Click Minimize to restore its original size.
¶ Zoom In/Out
- Right-click and drag in or out.
- You can also use the scroll button.
¶ Move Flowchart
- Left-click and hold to move the entire flowchart in any direction.
¶ Delete Block
- Remove all connections first before deleting a block.
¶ Change Arrow Position
- Select the arrow and use up/down or side arrows (⭥ / ⇿) to reposition.
¶ Start and Flow Logic
- Start Block can only connect to a filter block (Lead/Account/Contact/Opportunity Filter).
- Decision Blocks (Filters) have Yes (Y) and No (N) paths:
- If the condition is met, the flow continues from the Y connector.
- If not, it continues from N.
- Decision blocks can connect to any block.
Note: Using both Y/N connectors is optional.
¶ Specific Block Rules
- Random Split must have exactly three child blocks: A, B, and C (cannot be a start block).
- Action Block has one output arrow and can connect to any block except start.
- Assignment Block cannot be a parent to any other block.
- You must use at least one Assignment Block to approve the router.
¶ Default Assignment Logic
The default assignment assigns leads to a Default Owner specified in the Details tab of the active router.
Scenarios where default assignment is used:
- When the qualified sales rep is inactive/unavailable (based on CRM or LeadAngel calendar).
- When the lead doesn’t qualify for any assignment block.
¶ Error Conditions:
- If the default owner is inactive, the lead remains unassigned.
- If webhook fails with the option StopProcessing, the lead remains unassigned.
- If a wait condition isn’t met, the lead remains unassigned until it is.
¶ User Roles and Access
| Role | Canvas Access |
|---|---|
| Admin | Full access |
| Standard | Full access |
| Read Only | View only |
| Calendar | No access |
¶ How to Create Blocks
Follow the below steps to create blocks in the Router flowchart:
¶ Decision Block
Combines smart lists from Data Dictionaries to create routing filters and conditions.
Can be applied to Leads, Contacts, Accounts, Opportunities.

Steps:
- Drag and drop the Decision Block.
- Double-click to open.
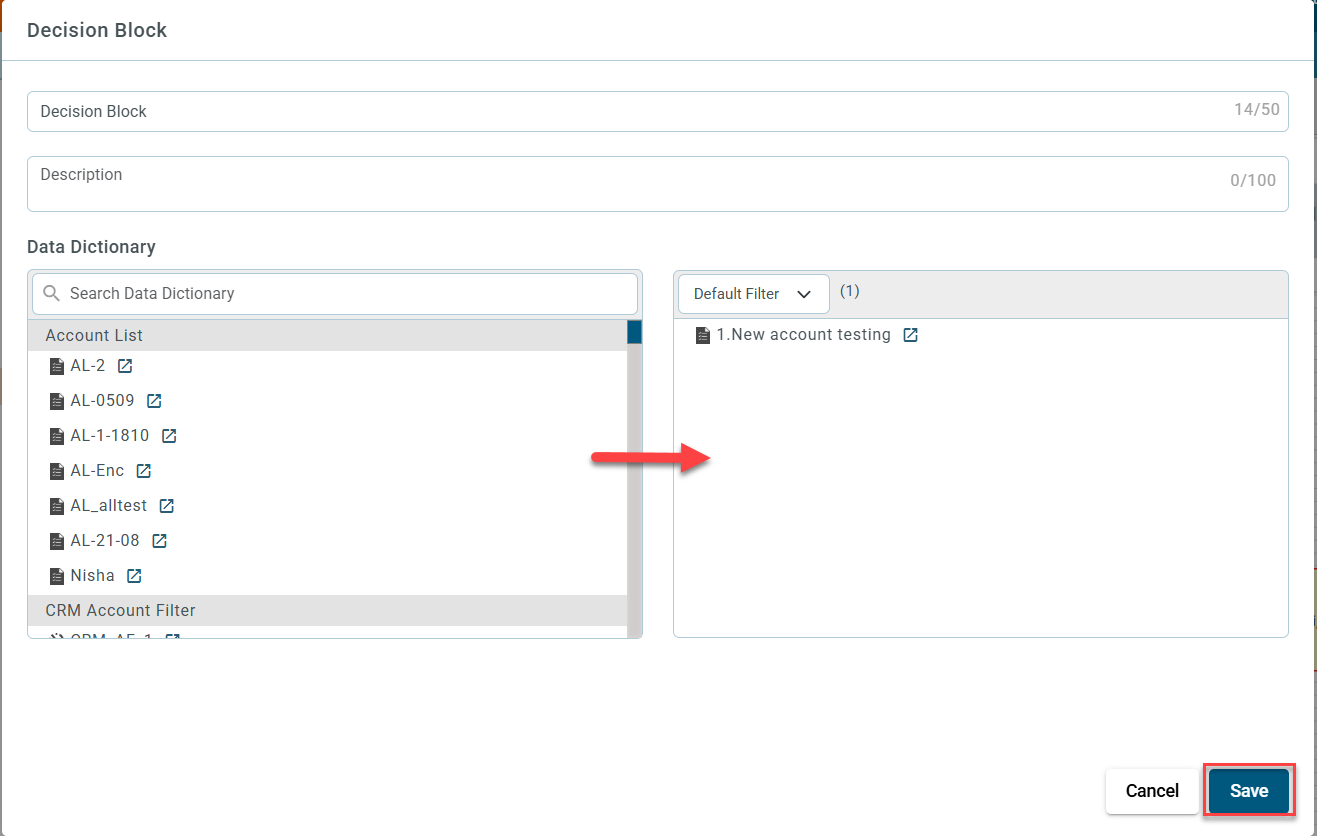
- Select filters from the Data Dictionary.
- Click Save.
¶ Assignment Block
Holds routing rules for objects that qualify through filters.
Red border: incomplete/inaccurate.
Green border: complete/accurate.
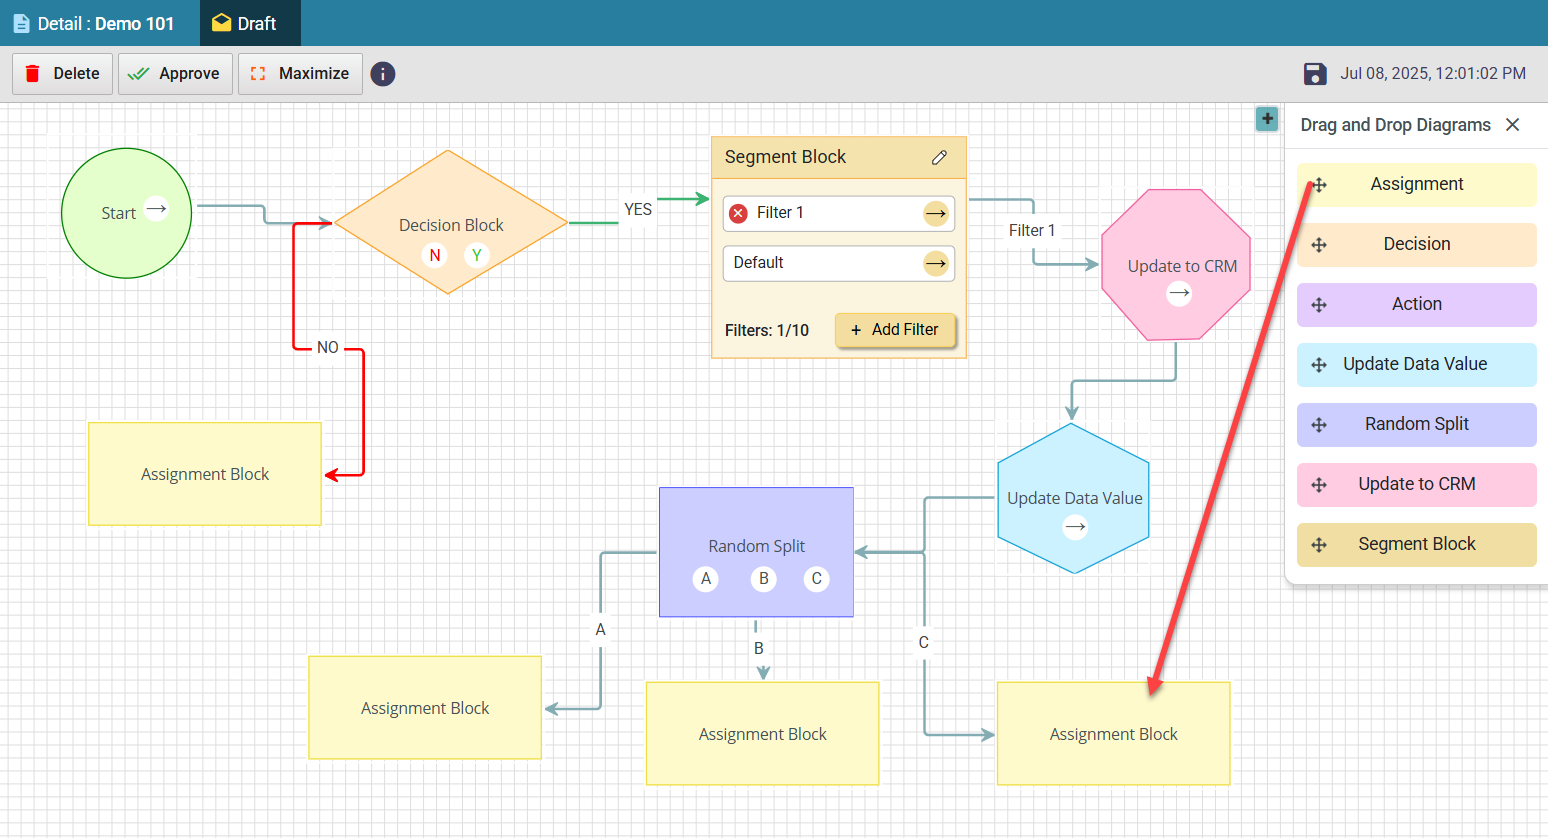
Steps:
- Drag and drop the Assignment Block.
- Double-click to open.
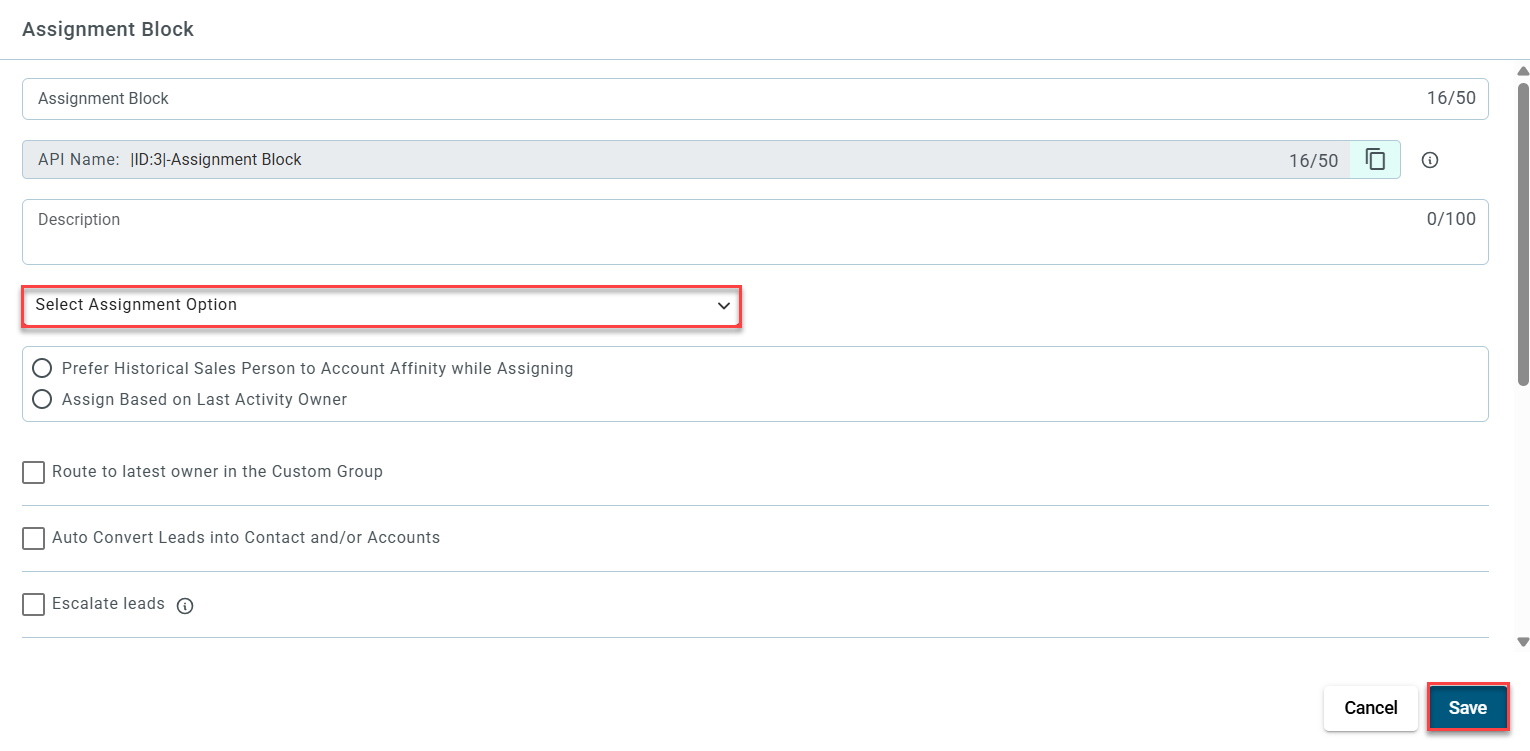
- Add name and description.
- Choose appropriate Routing Assignment from Assignment Options and conditions.
- Select additional options like routing notification channels, auto convert leads into contact and/or Accounts, prefer historical sales person to account affinity while assigning, assign to AE mapped SDR instead, assign based on last activity owner or create task for the new owner.
- Click Save to save the assignment block settings.
¶ Segment Block
The Segment Block allows you to evaluate up to 10 filters in sequence and route records based on the first match. It's a more flexible alternative to the Decision Block.
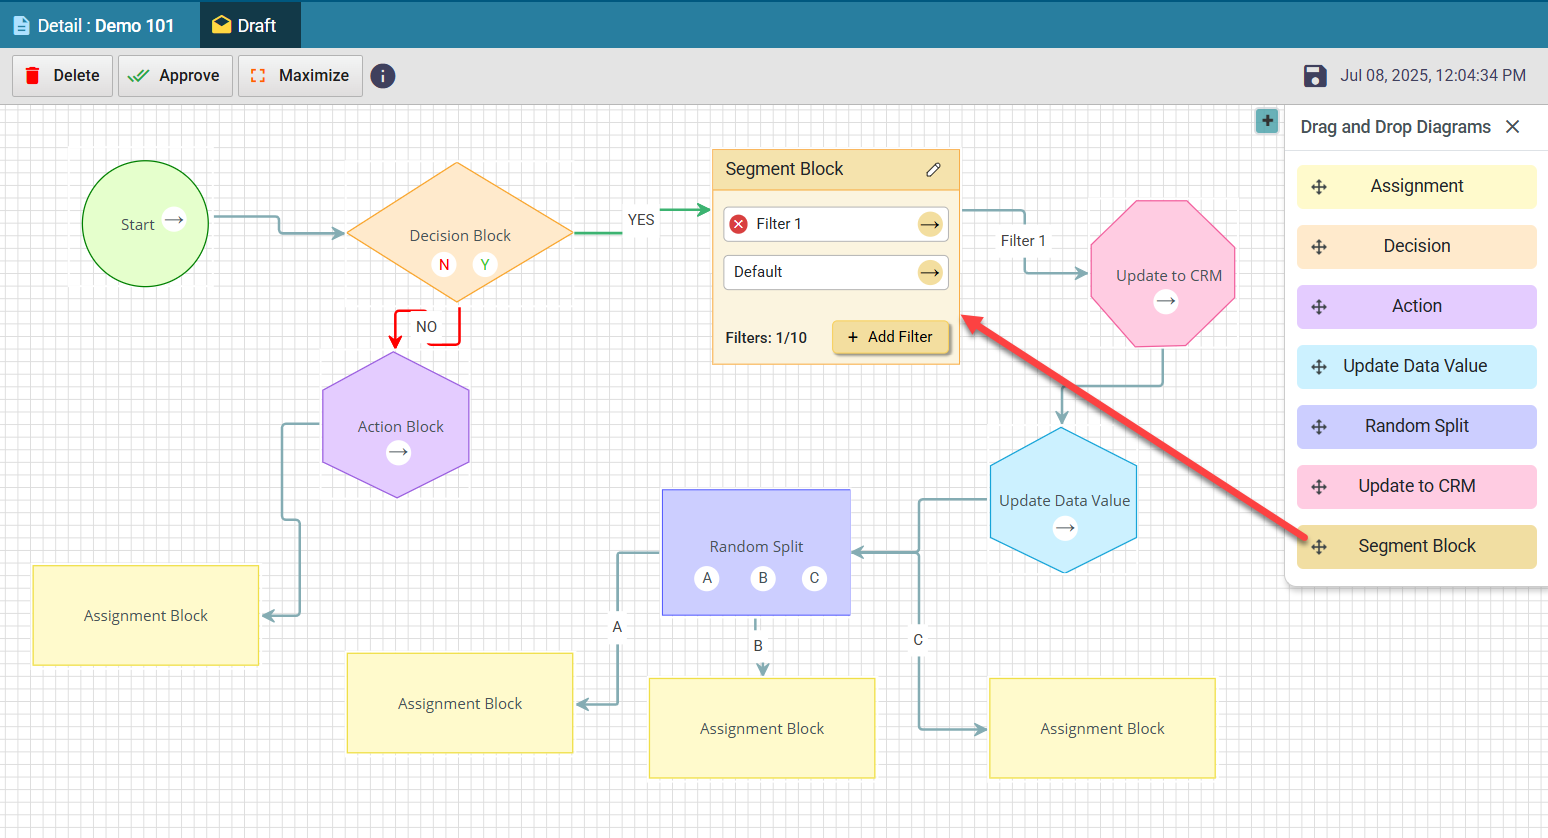
Steps:
- Drag and drop the Segment Block.
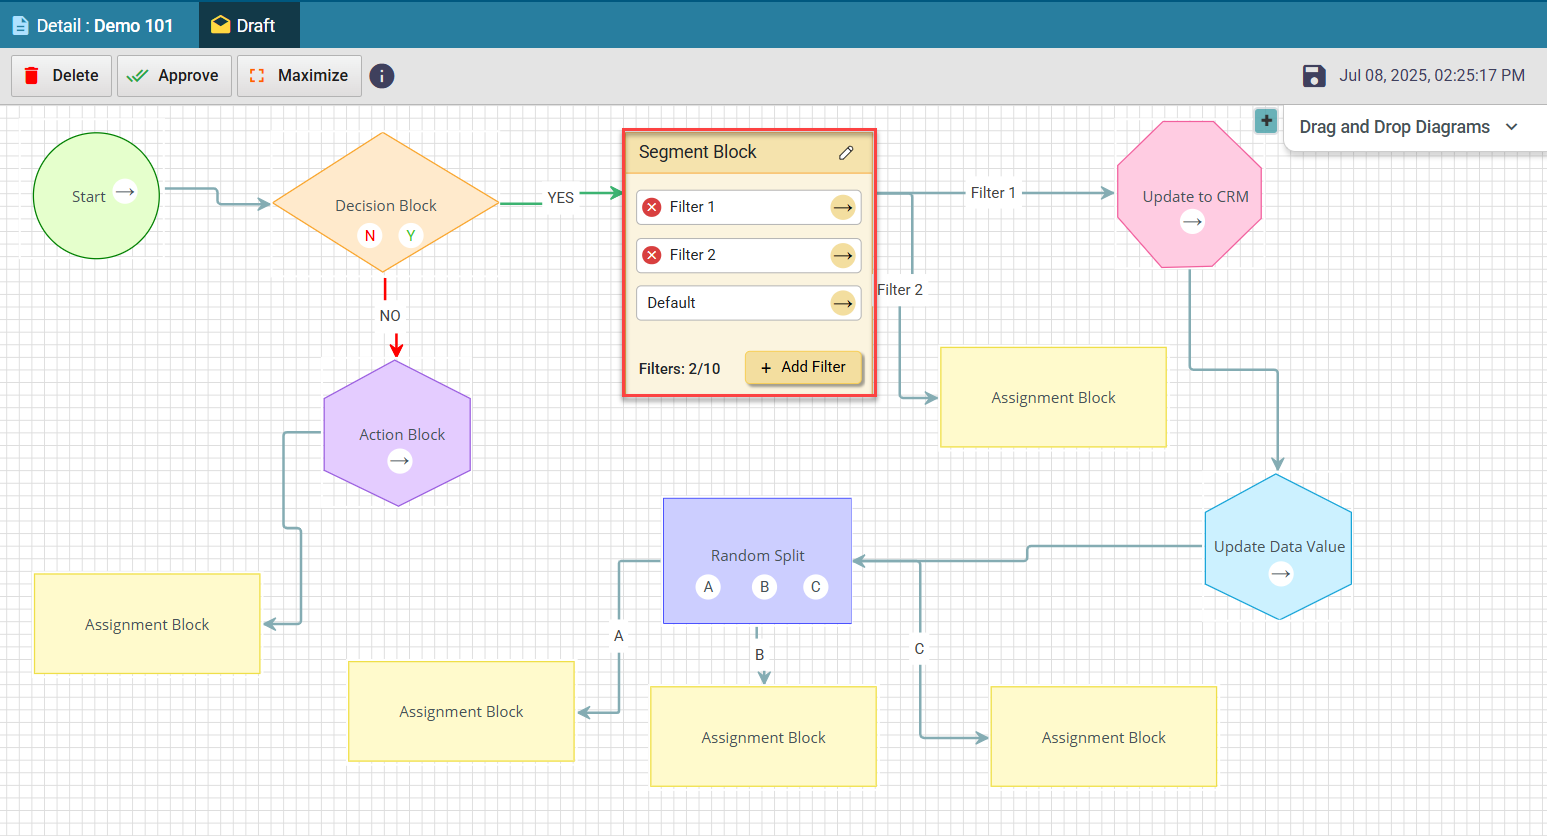
- Click on the + Add Filter to add filter block. Upto 10 filter blocks can be added.
- Double click on any filter block.
- Select a filter from the Data Dictionary and click Save.
- In the same, multiple (up to 10) filter blocks can be set. Each one having a single filter.
- Connect each filter block with other block, as per your requirement.
¶ How it works:
- Filters are evaluated top to bottom.
- The first matching filter routes the lead through its connected output.
- If a match is found but no output is connected, the lead is assigned to the default owner of the router.
- If no filters match, the lead takes the Default path (bottom-most output).
¶ Key points:
- Supports up to 3 inputs, all block types except Assignment Block.
- Each segment has one filter condition and one output.
- Click "Add Filter" to add segments; remove any except Default.
- Usable across multiple routers: Lead, Contact, Account, and Opportunity modules.
Use the Segment Block when you need ordered, multi-condition routing in a clean and manageable layout.
Example Use Case:
Let’s say you’re routing leads based on geography:
- Filter 1: State = California → goes to a specialized Assignment Block.
- Filter 2: State = Texas → sends to a different assignment block.
- Filter 3: State = New York → routes to a custom CRM update.
- If none match → lead follows the Default path.
¶ Action Block
Supports Webhook or Wait actions while routing.
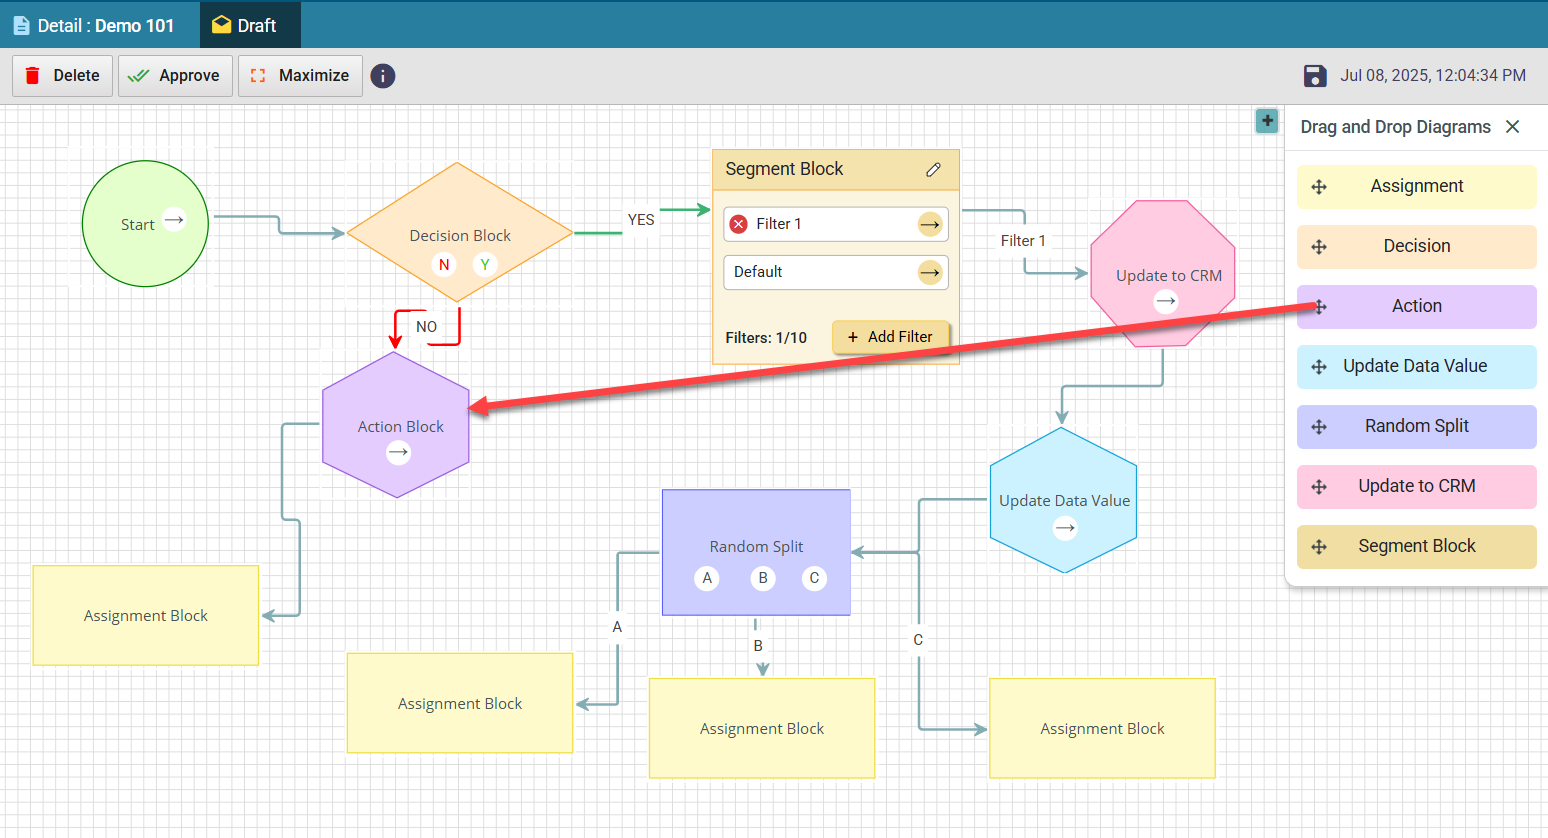
Steps:
- Drag and drop the Action Block.
- Double-click to open.
- Add name and description.
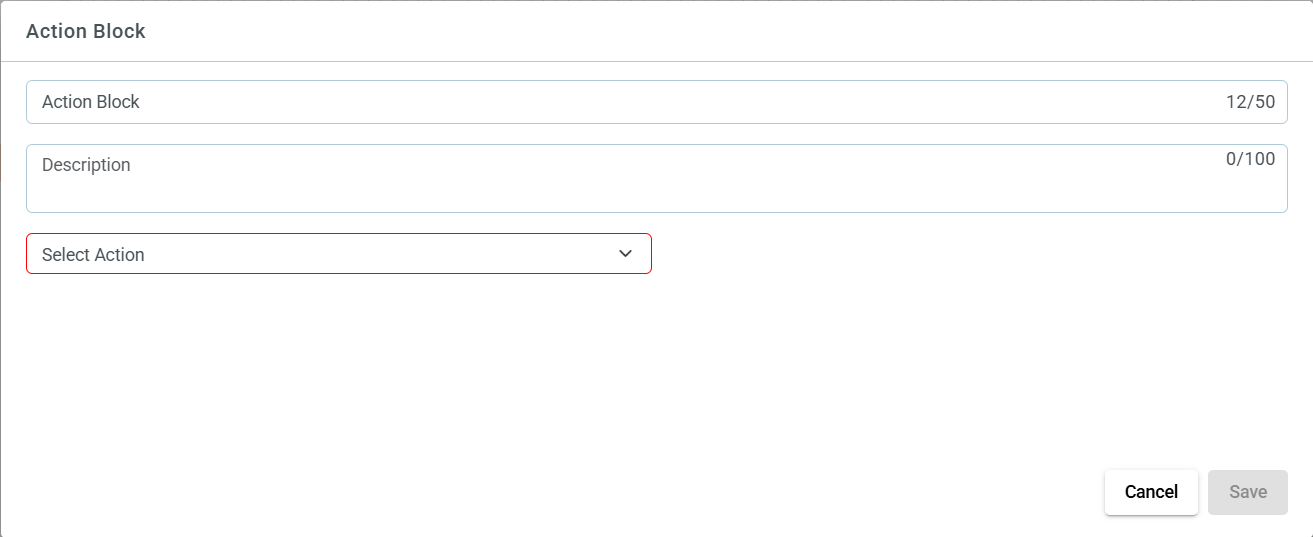
- Select Call Webhook for webhook actions or Wait and select wait condition from the dropdown.
- Click Save to save the action.
¶ Update to CRM Block
Pushes updated data and records from LeadAngel to CRM while routing.
Useful with webhooks or API integrations.
Steps:
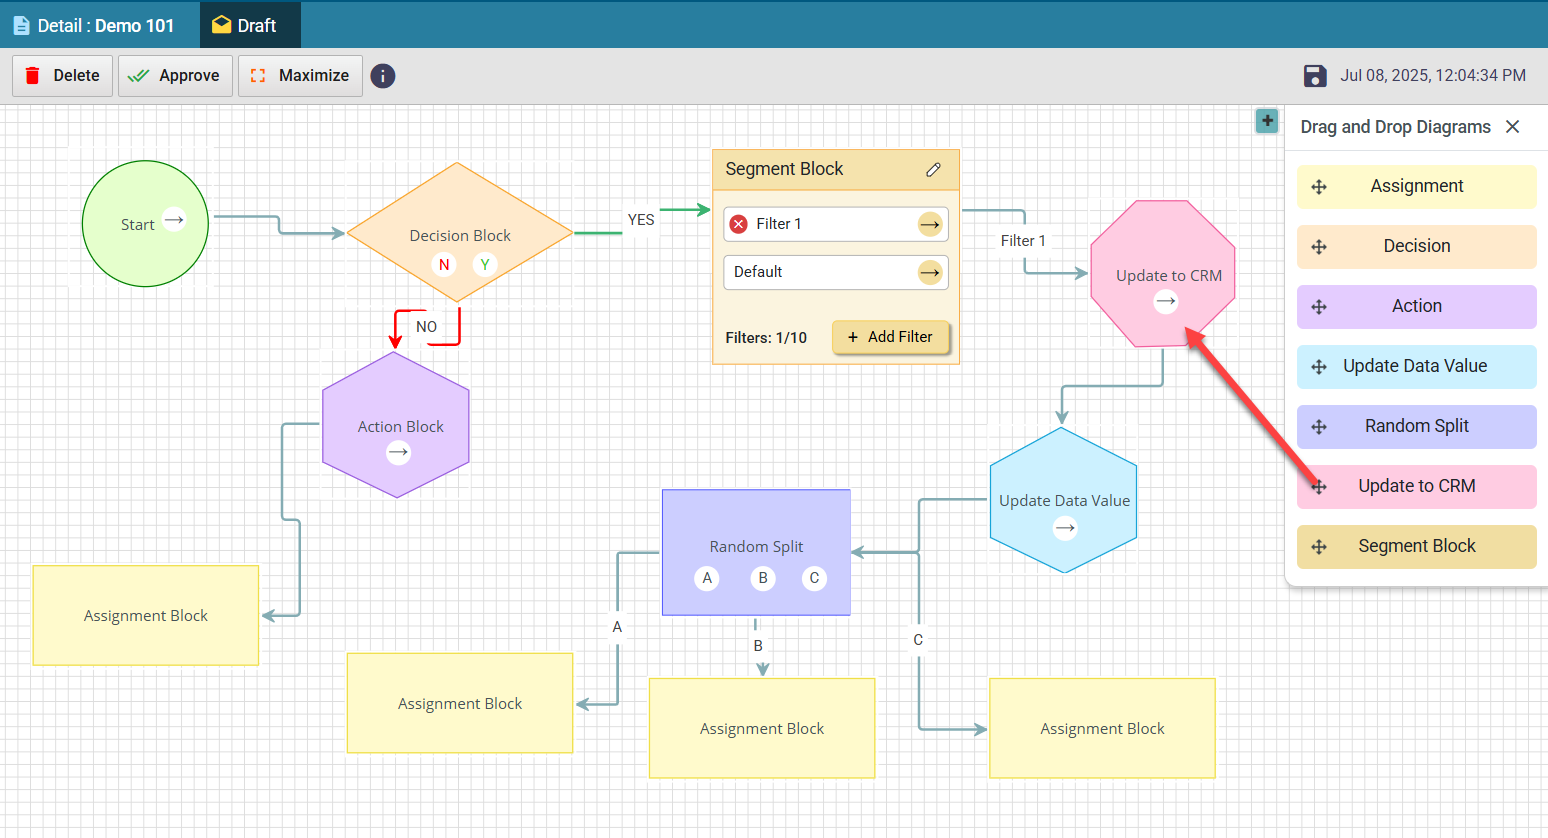
- Drag and drop the Update to CRM Block.
- Double-click to open.
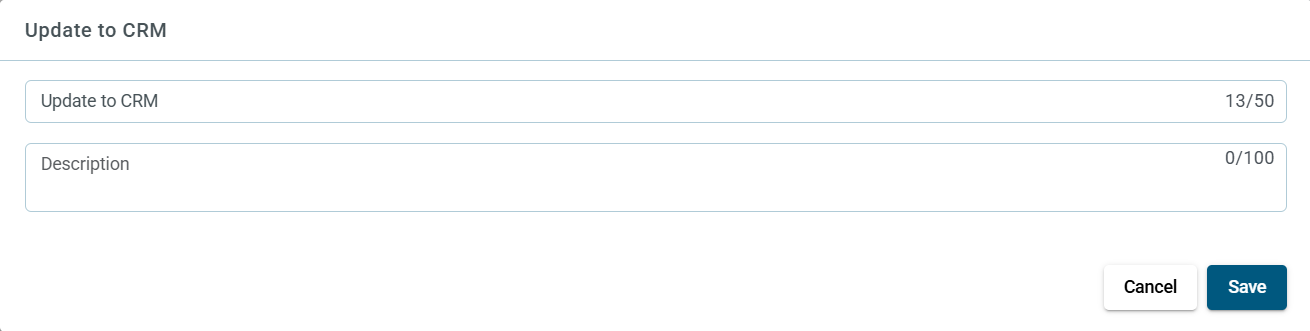
- Add name and description.
- Click Save.
¶ Random Split Block
Distributes leads unequally across 3 assignment blocks: A, B, and C. Each block can have its own assignment options, selected sales team or rep. Please enter the % split for each out flow. The total of all outflow must add to 100%.
Takes up to 3 input arrows.
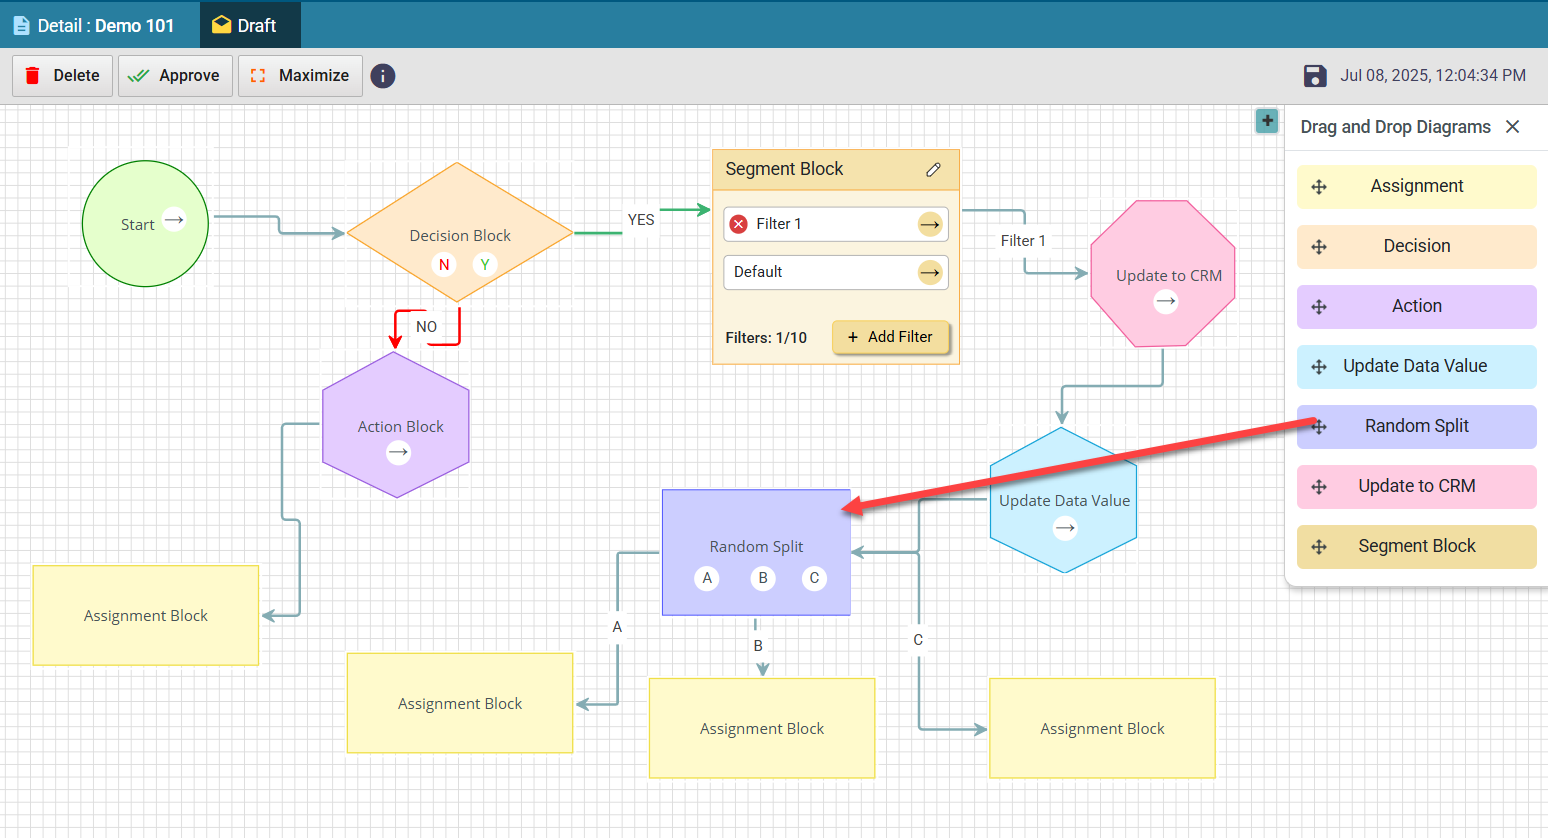
Steps:
- Drag and drop the Random Split Block.
- Double-click to open.
- Add name and description.
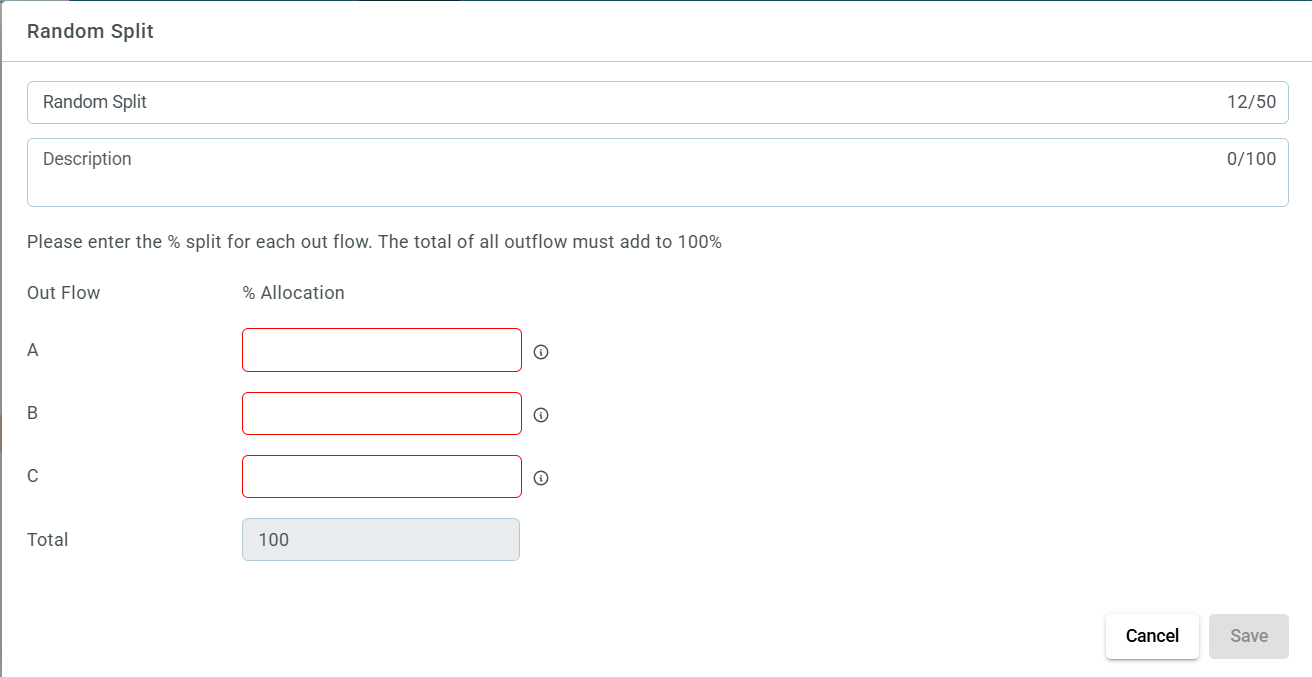
- Enter split percentages for A, B, and C (must add up to 100%).
- Click Save.
¶ Update Data Value Block
Updates field values in LeadAngel and CRM while routing.
Steps:
- Drag and drop the Update Data Value Block.
- Double-click to open.
- Click Add Fields.
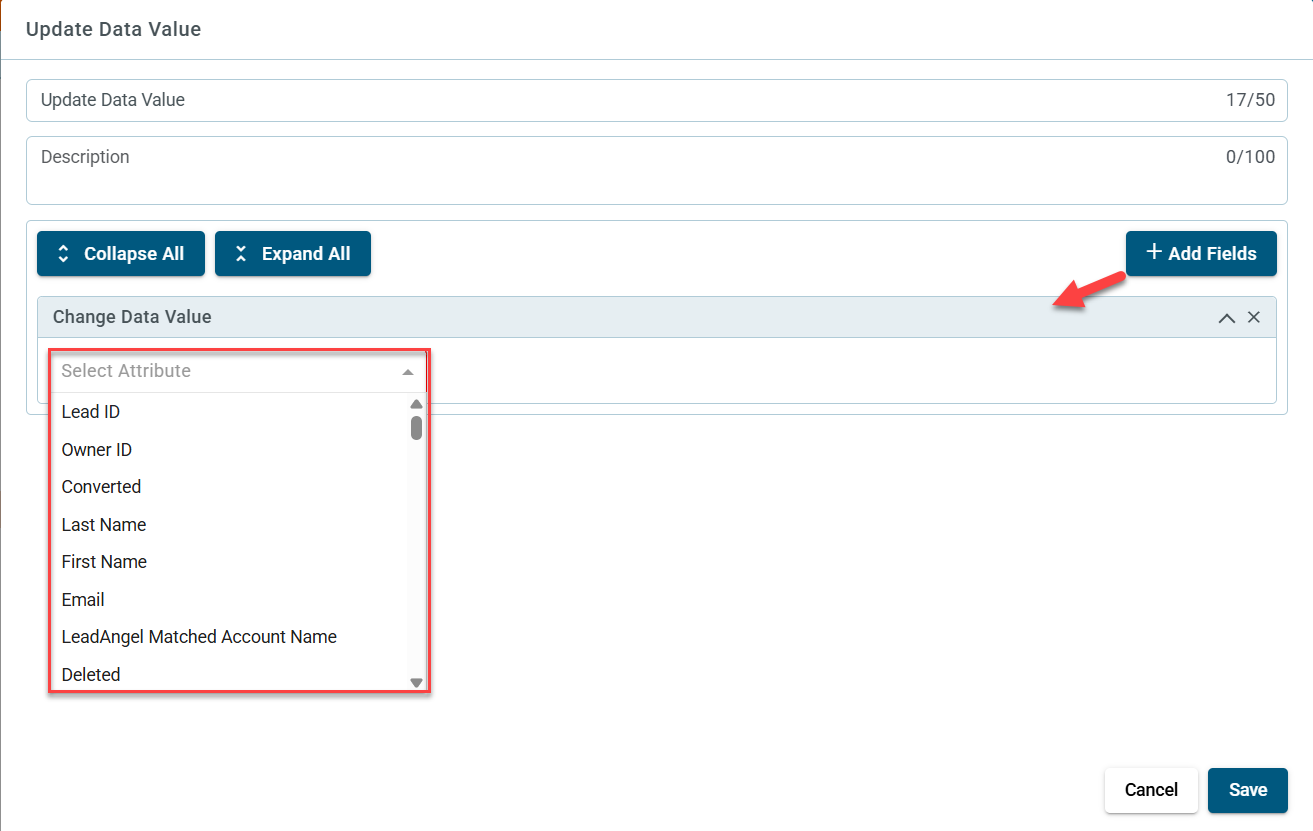
- Choose an attribute from dropdown.
Based on attribute type:
- Lookup Field: Select a related record.
- Text/String: Enter a text value.
- Number: Enter a numeric value.
- Datetime: Pick a date using the date picker.
- Boolean: Select True or False.
- Formula: Enter formula (e.g.,
score + 10).
- Add multiple fields as needed.
- Click Save.
¶ Final Step
Once all blocks are connected appropriately, click Approve for the router to become approved and then it can be activated by clicking on "Activate".