Email notifications are used to notify the lead owner, account executive, or any other sales team member of the new lead assignment.
You can include lead and account details in the email with the email notification.
You can also map BDR and Sales Reps, and notify a mapped sales rep (such as an account owner, etc.) when a new lead is assigned to BDR.
¶ Use Cases
Case 1: If any mail merge field is not available, then the mail delivered will contain that field as empty.
Case 2: If the lead owner and account team member or any other field is selected where the mail IDs are the same, then the mail will be delivered only once.
Case 3: If a lead is not matched to an account, but the matched field is used in an email notification, then the result will show an empty value.
Case 4: You can choose multiple account team roles to send notifications from the account team dropdown like senior developer, junior developer, channel manager, account manager, etc.
Case 5: If a user selects data that exists in the system, it may happen that it doesn’t have an email ID and therefore, the mail will not be delivered.
Case 6: When a lead is qualified for auto conversion, then the email notification and SFDC process builder will not work for that lead, even if in the assignment block the user has selected the "notify lead owner" option.
¶ How to Set Up Email Notifications
To begin with, you first have to create a template for the email notification feature to be selected from any of the routers.
¶ How to Create an Email Notification Template
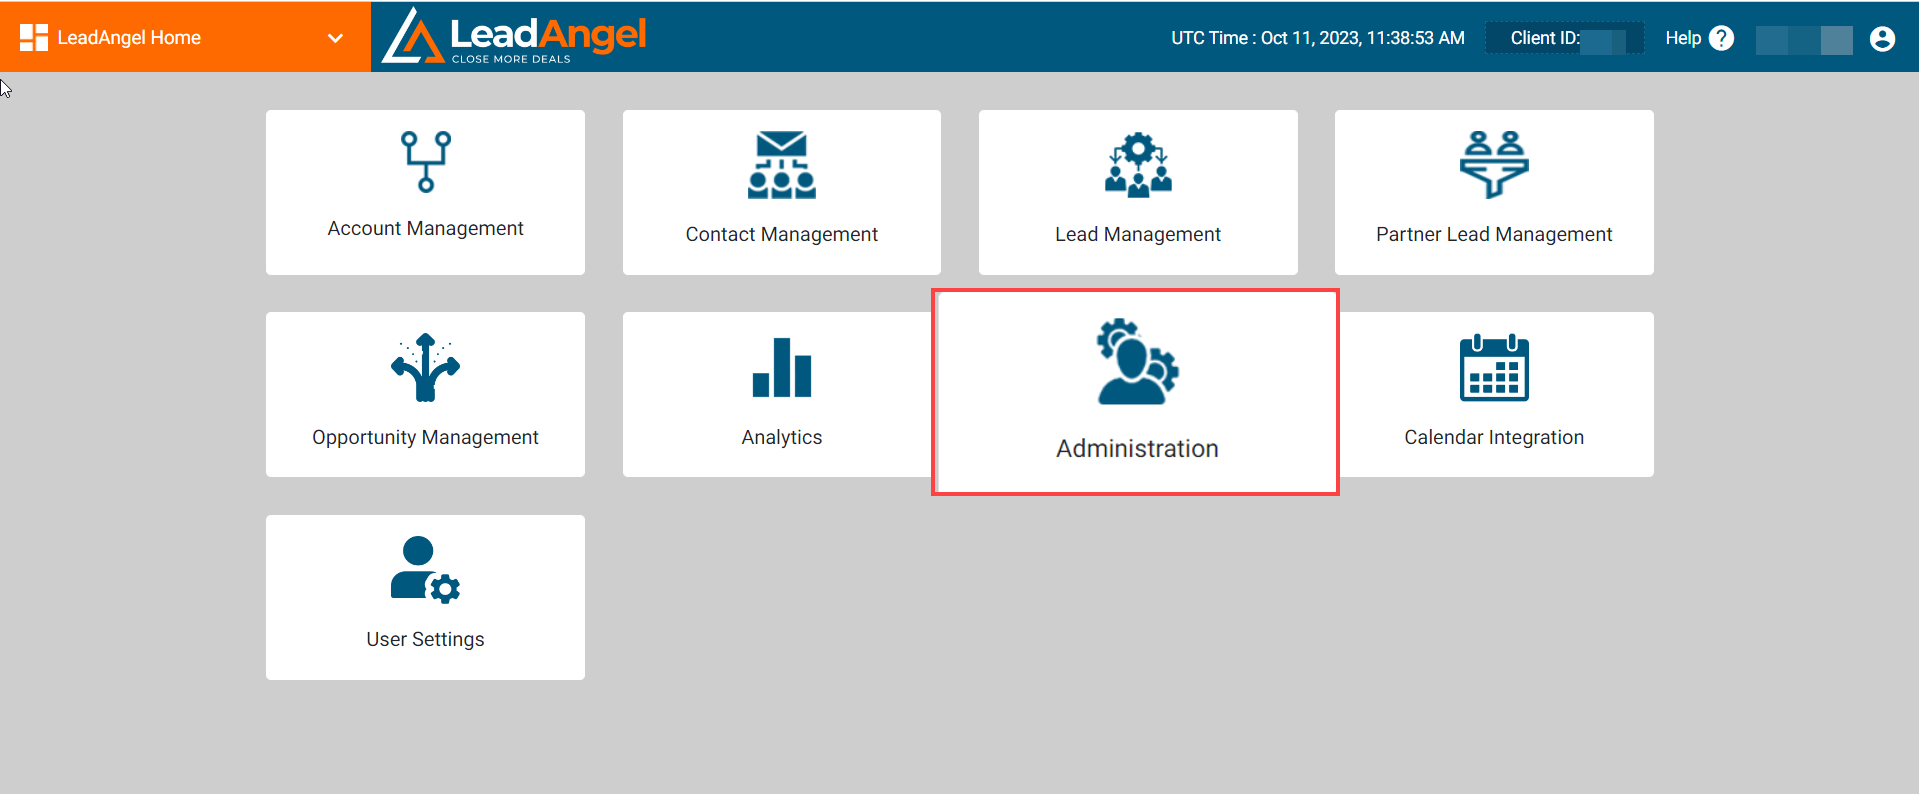
Step 1. Sign in at app.leadangel.com and select Administration.
Step 2. Go to Notifications, right-click on Email, and a new email alert template will appear.
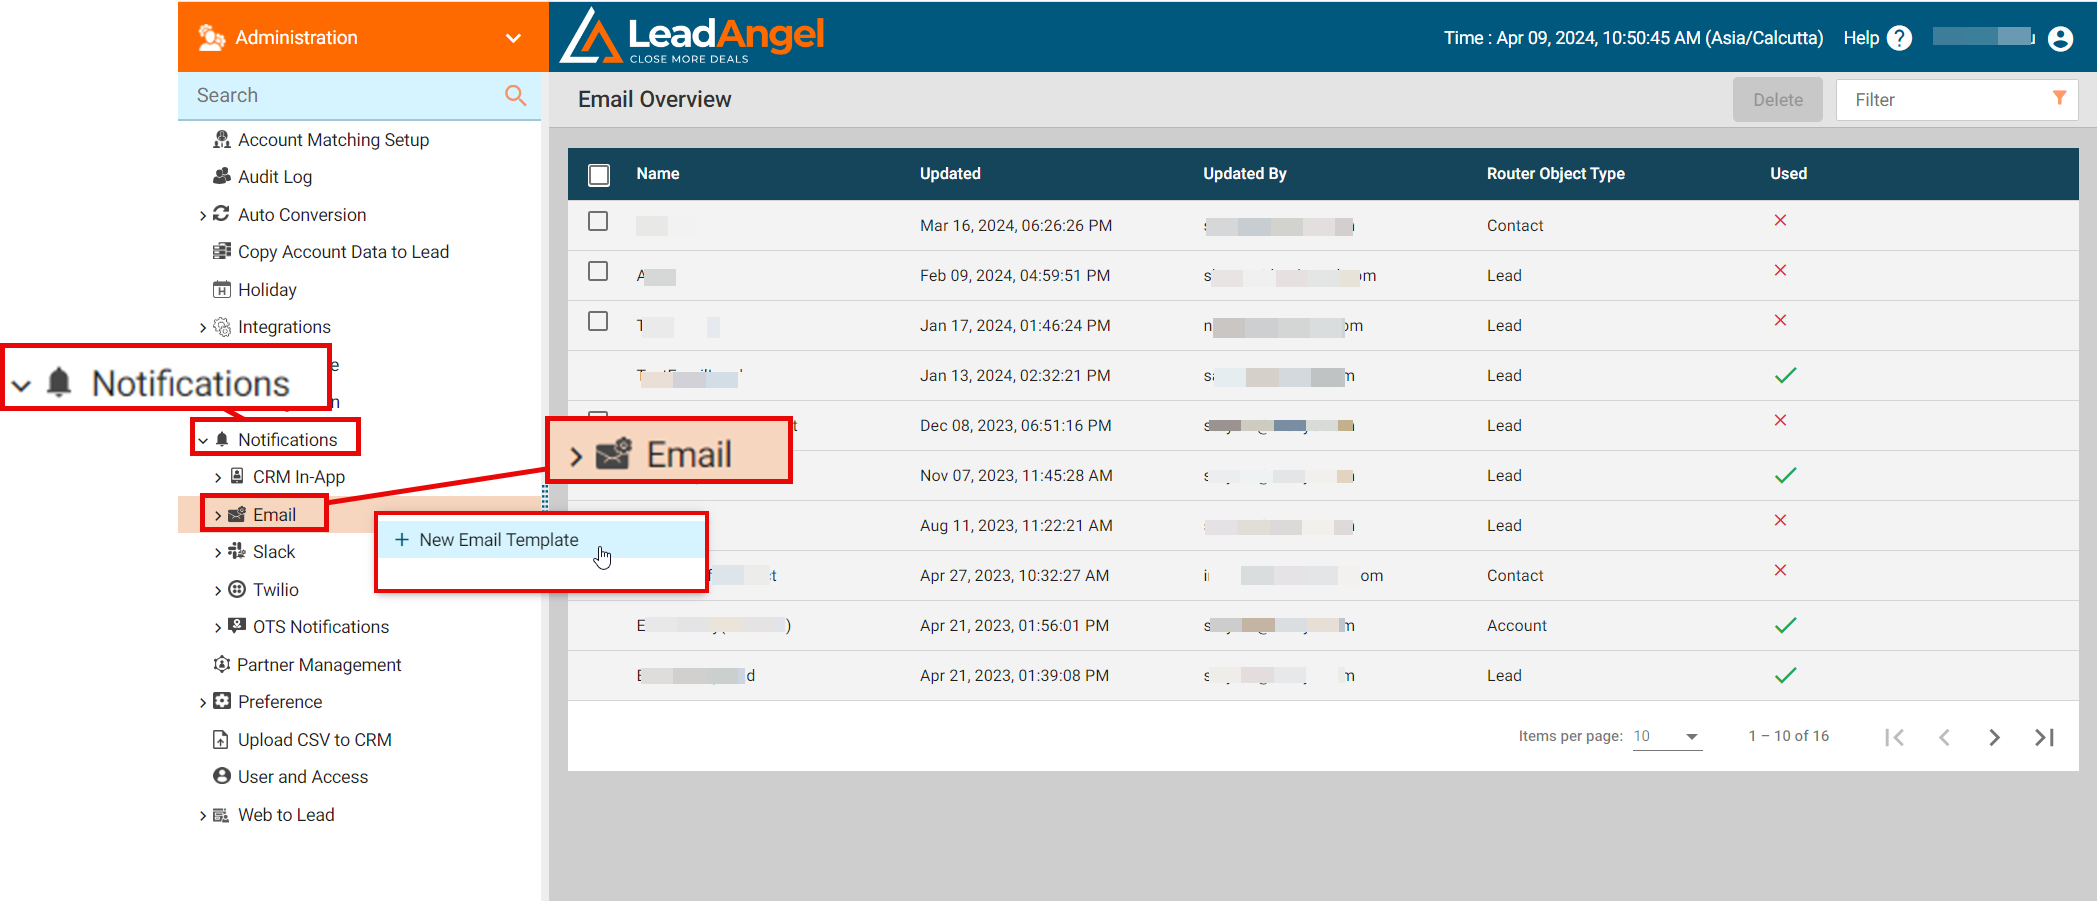
Step 3. Click the + New Email Alert Template.
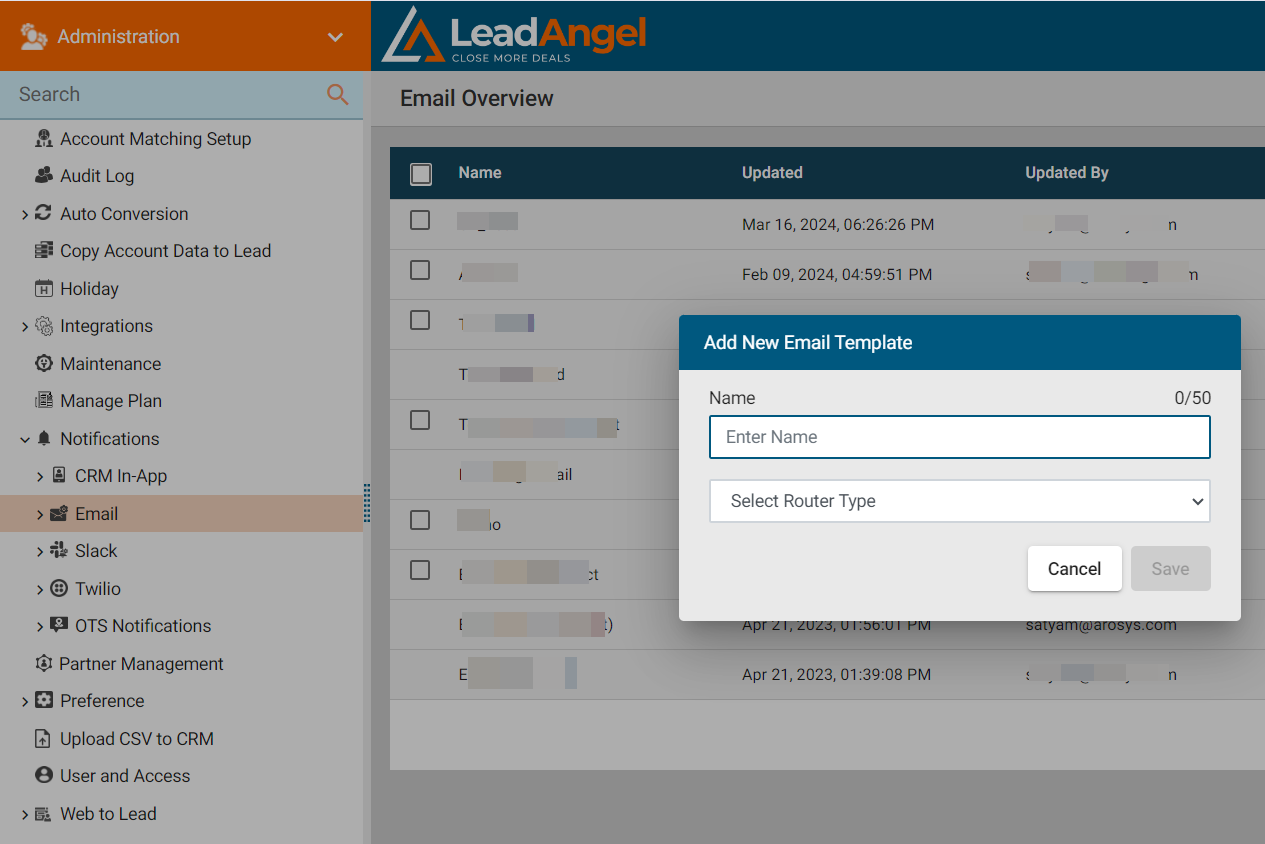
Step 4. Give the template a name. Select the router type to send email notifications. Any one of the router types needs to be selected. Click Save.
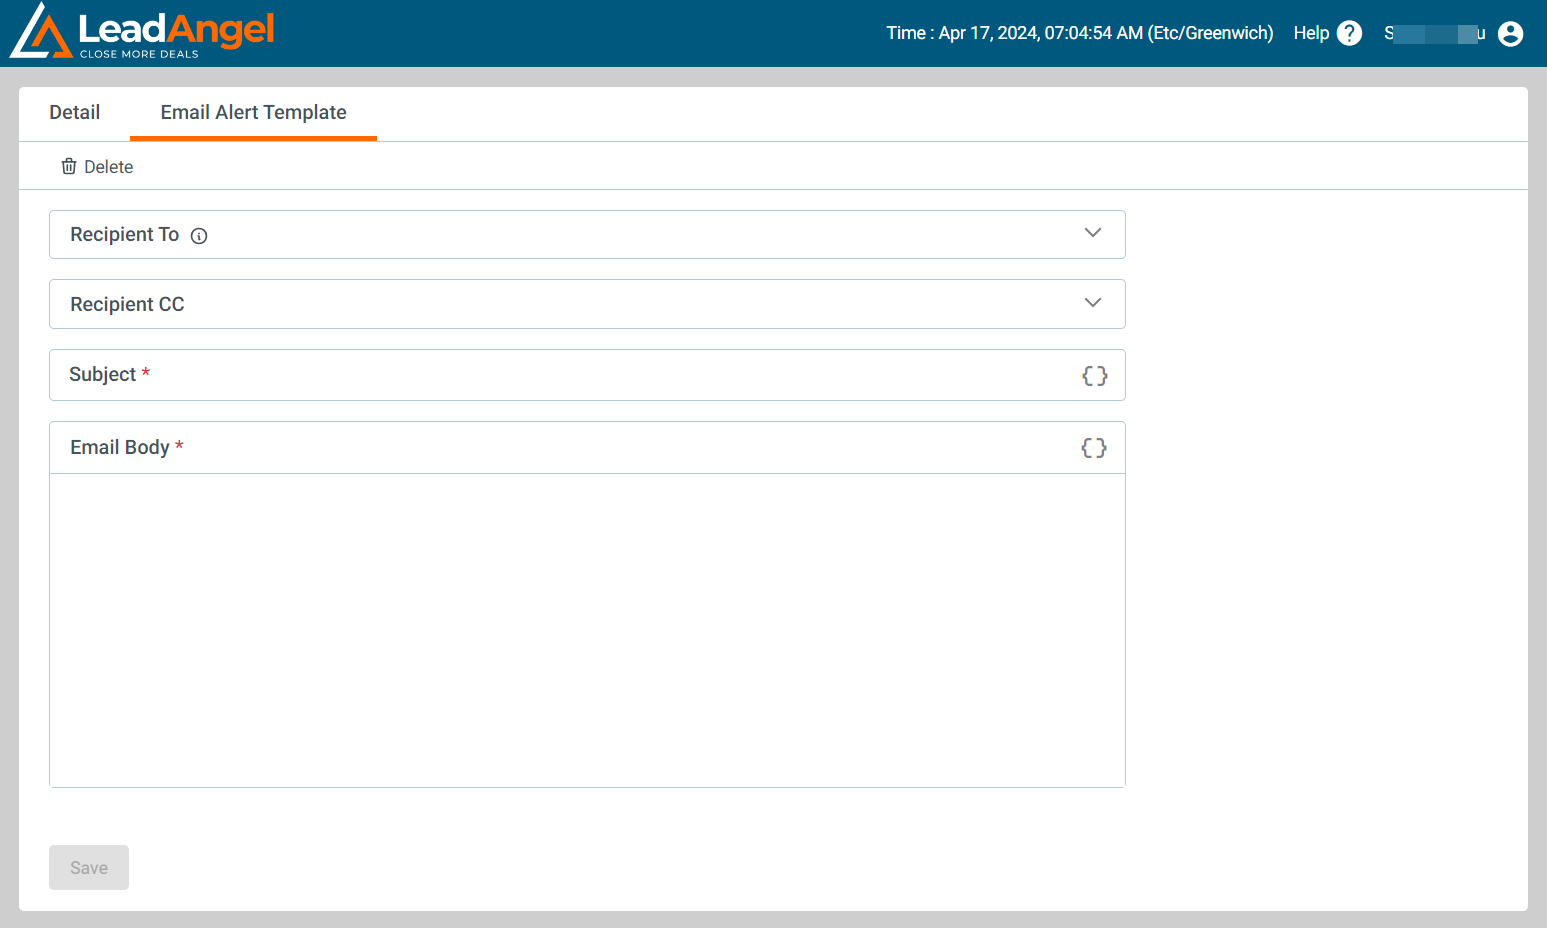
Step 5. Click on the necessary recipient to whom the email notification has to be sent. For example, to send an email to the lead owner, select the lead owner. Likewise, select account owner, account team, etc. You may also check "Notify based on the lookup field on Account" and select a field from the dropdown to send an email to the mapped user.

- Multiple email addresses must be separated with a comma.
- A maximum of three lookup fields can be selected.
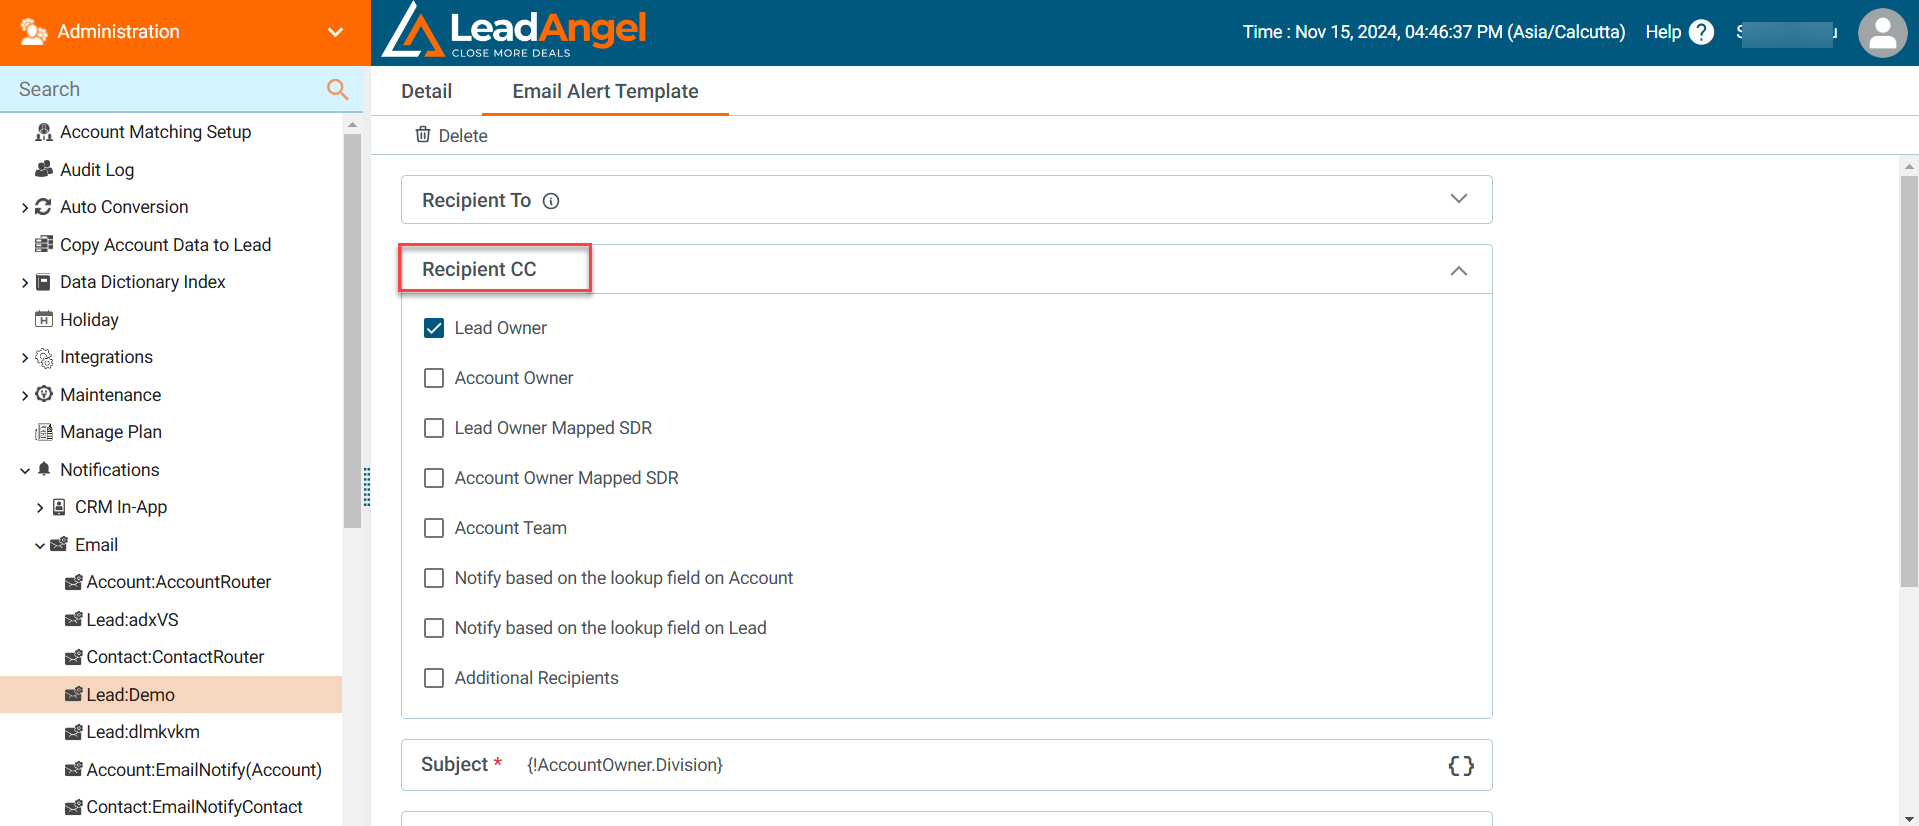
Step 6. Similarly, add recipients to whom you want to send a copy of the email notification from the Recipient CC section.
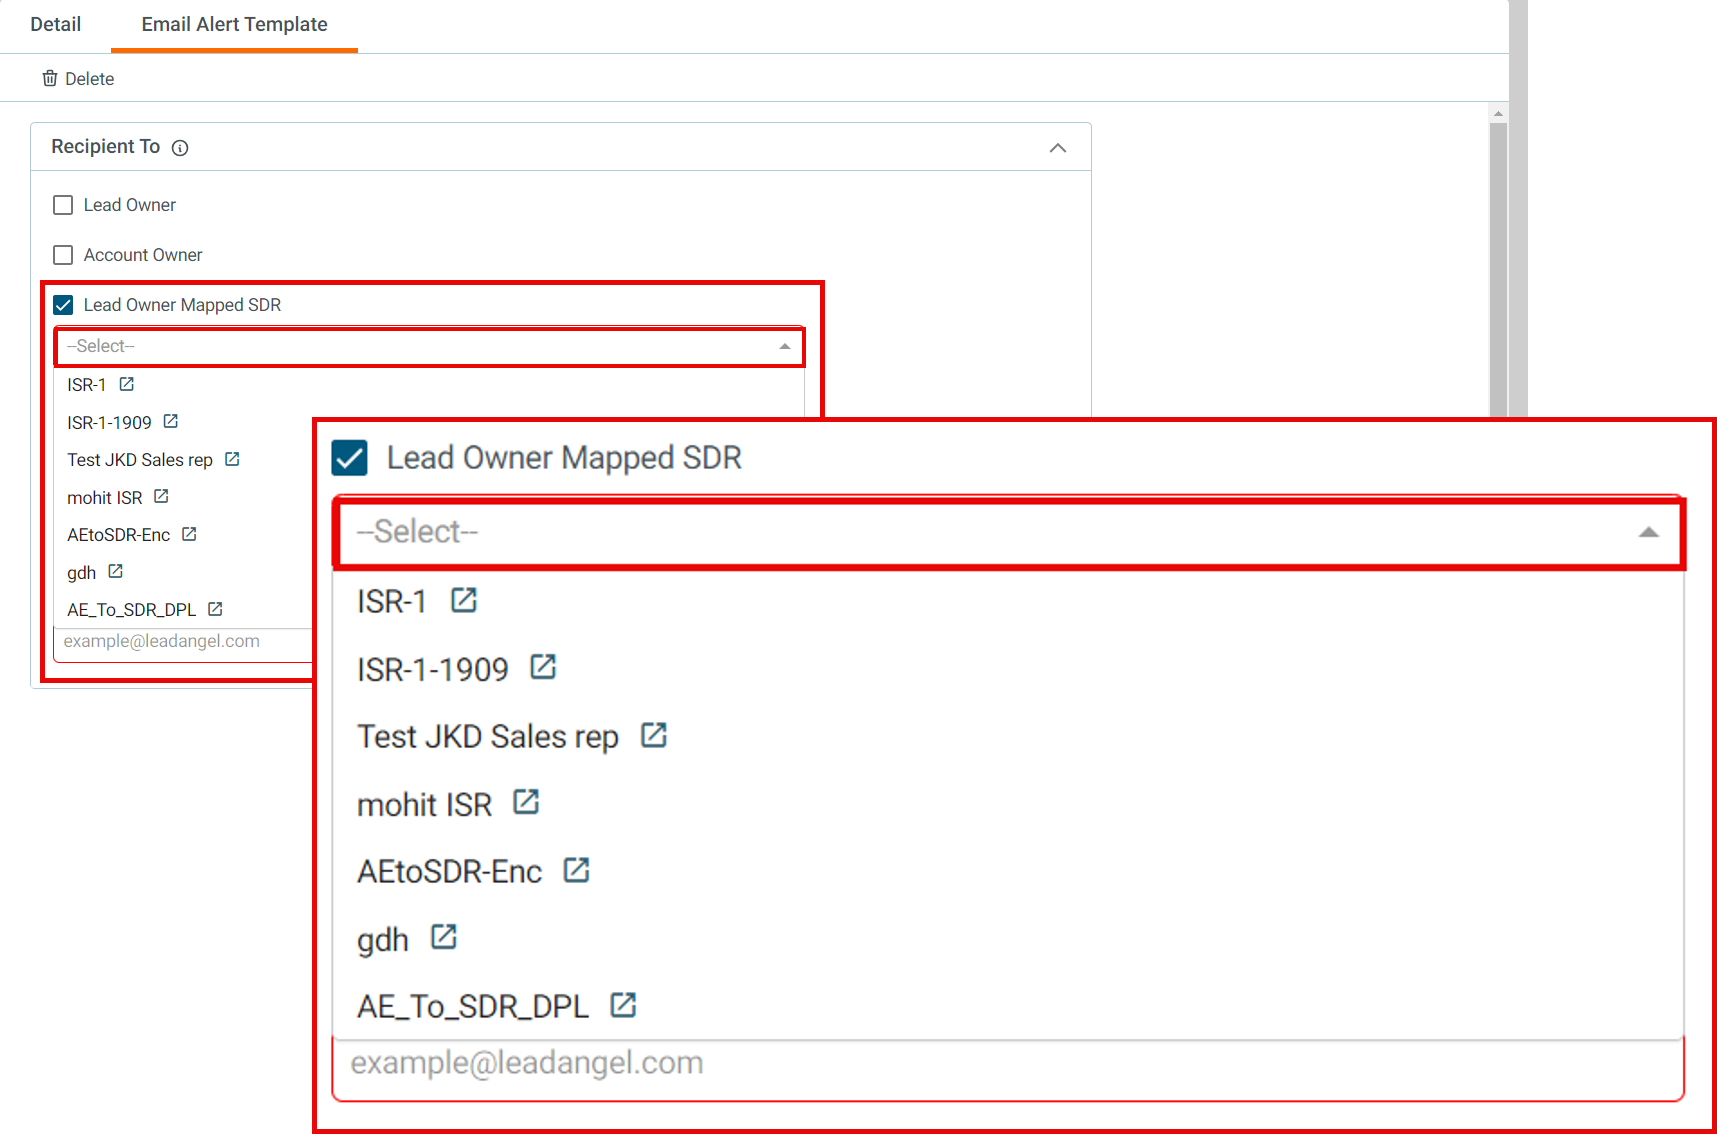
Step 7. If you want to send the email notification to the lead owner-mapped ISR or account owner-mapped ISR, click on the checkbox in the Recipient TO section. You will get a dropdown to select the ISR mapped to either the lead owner or account owner. Similarly, this can be selected in the Recipient CC section if the mail has to be sent as CC to the ISR.
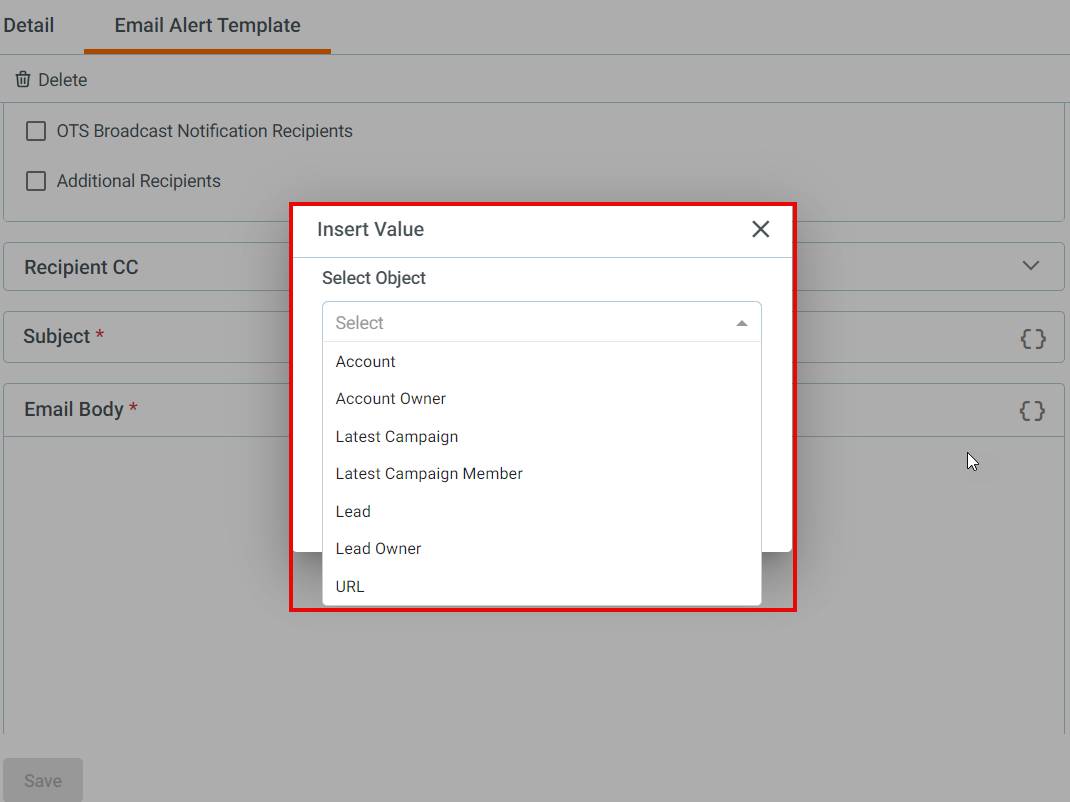
Step 8. An added feature snippet can be seen in the subject line and email body. When a user clicks on a snippet, a box appears wherein you need to first select and choose an object both in the subject snippet and email body snippet—viz. lead, account, lead owner, and the account owner.
- If a user enters some invalid token in the snippet, then an invalid token will be printed as is.
Step 9. Select fields that you feel are important to mention in the subject line and email body for the emails—e.g., full name, company, country, state, etc. You can select more than one field in this section.
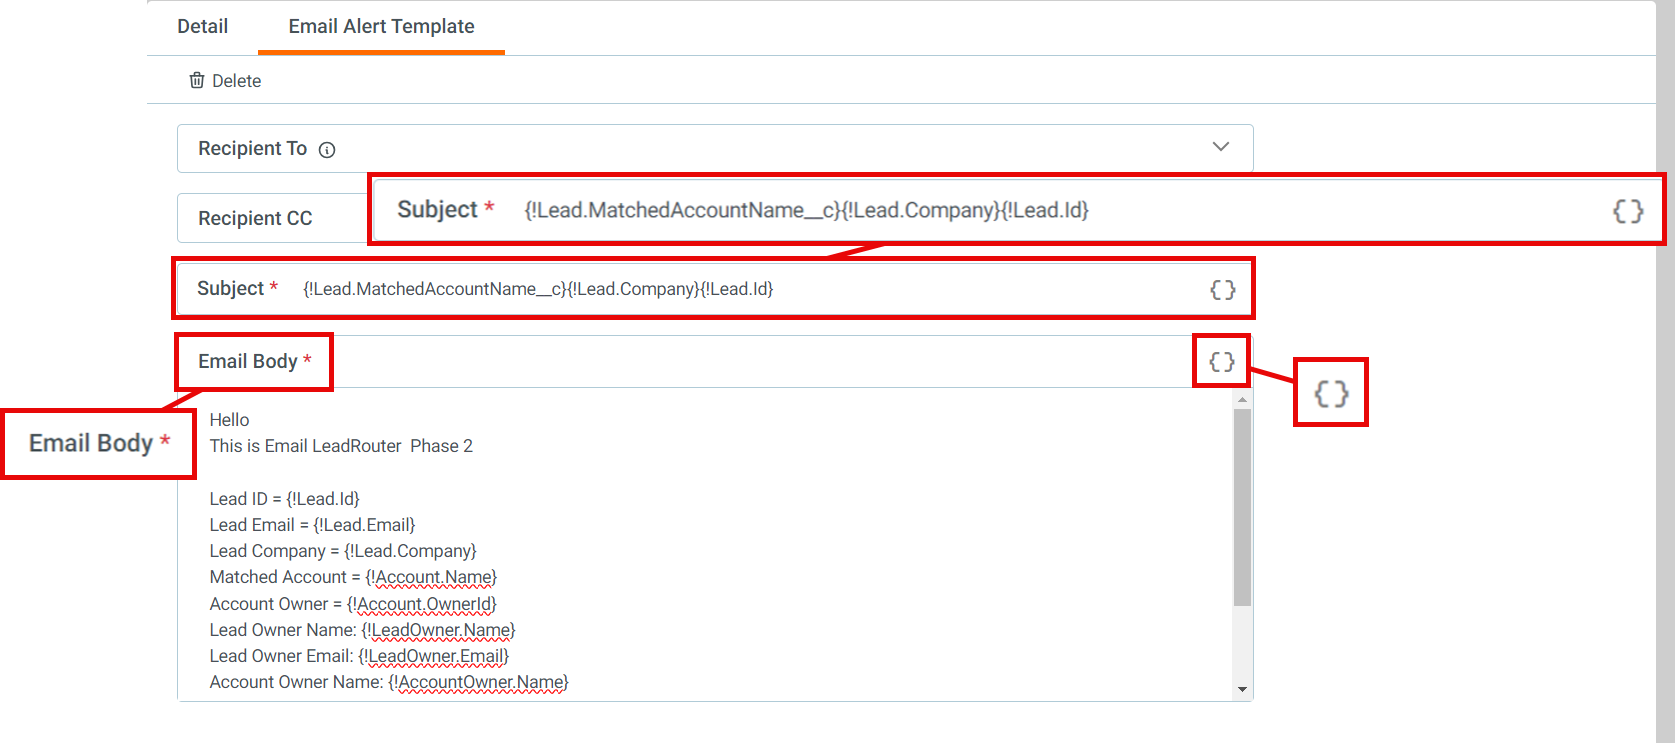
Step 10. Finally, write the body of the email along with the various fields to be added through snippets.
¶ How to Use an Email Notification Template in the Router
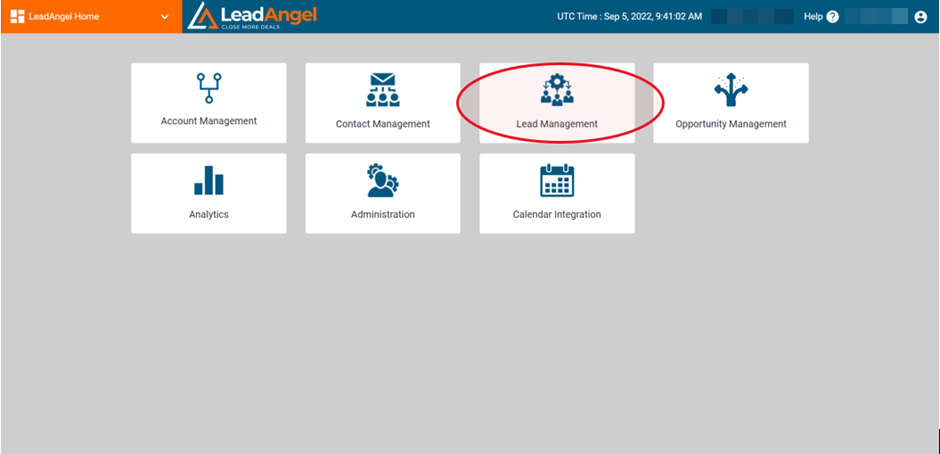
- Sign in at app.leadangel.com and select any router. For example, go to Lead Management.
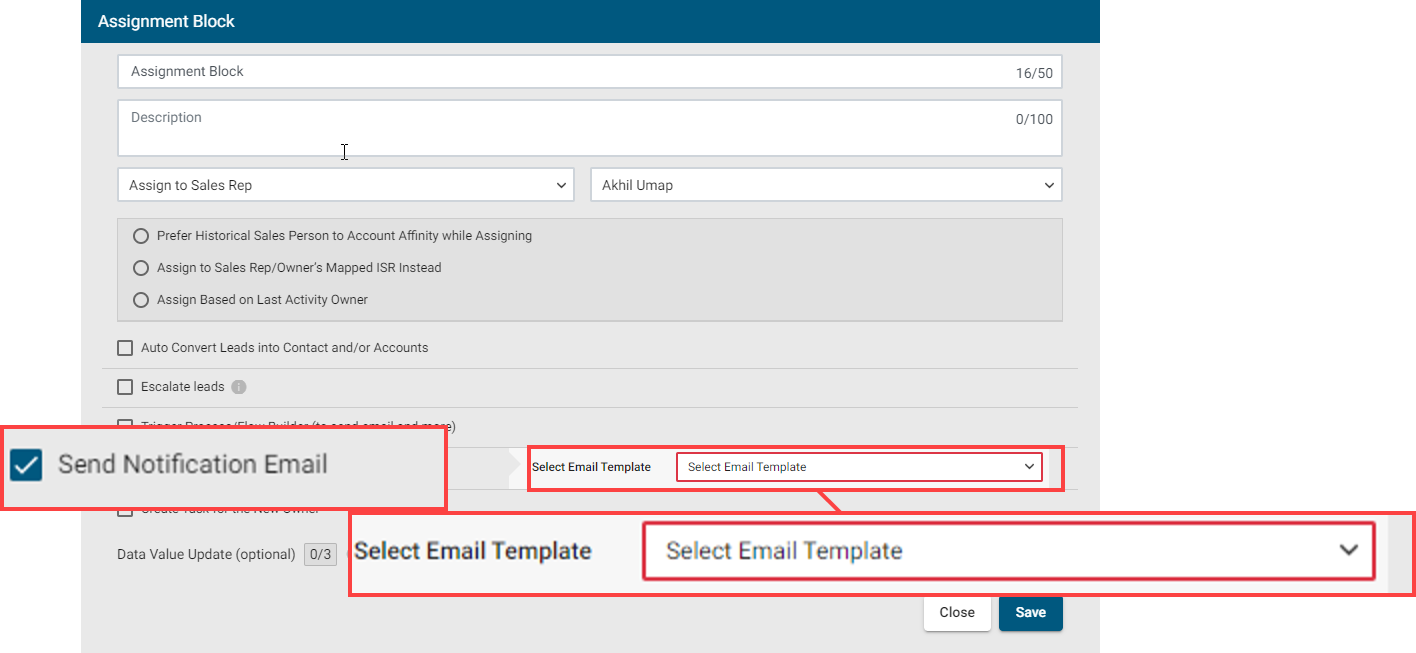
- Go to Lead Routing > Lead Router > Assignment Block. If you are creating a new router, then right-click to create a new router and set it up.
- Double-click on the Assignment Block, click on "Send Notification Email", and select the email template you created for that particular router from the dropdown.
And you are ready to use this feature in LeadAngel to send email notifications after you have matched and routed the lead.